
Table of contents:
USB capture card (OBS software and POTPLAYER software)PCIE capture card (OBS software)
Thunderbolt capture card (OBS software)
USB capture card
Advantages: No driver required, plug and play, easy to carry.
Disadvantages: Unable to capture multiple video sources at the same time.
Introduction to the interfaces:
Type-C: Connect to laptop, Phone, iMac, etc.HDMI IN: Connect to PS5, DVD, SWITCH, Camera, etc.
HDMI OUT: Connect to monitor
1. Capture settings for OBS software in Windows system:
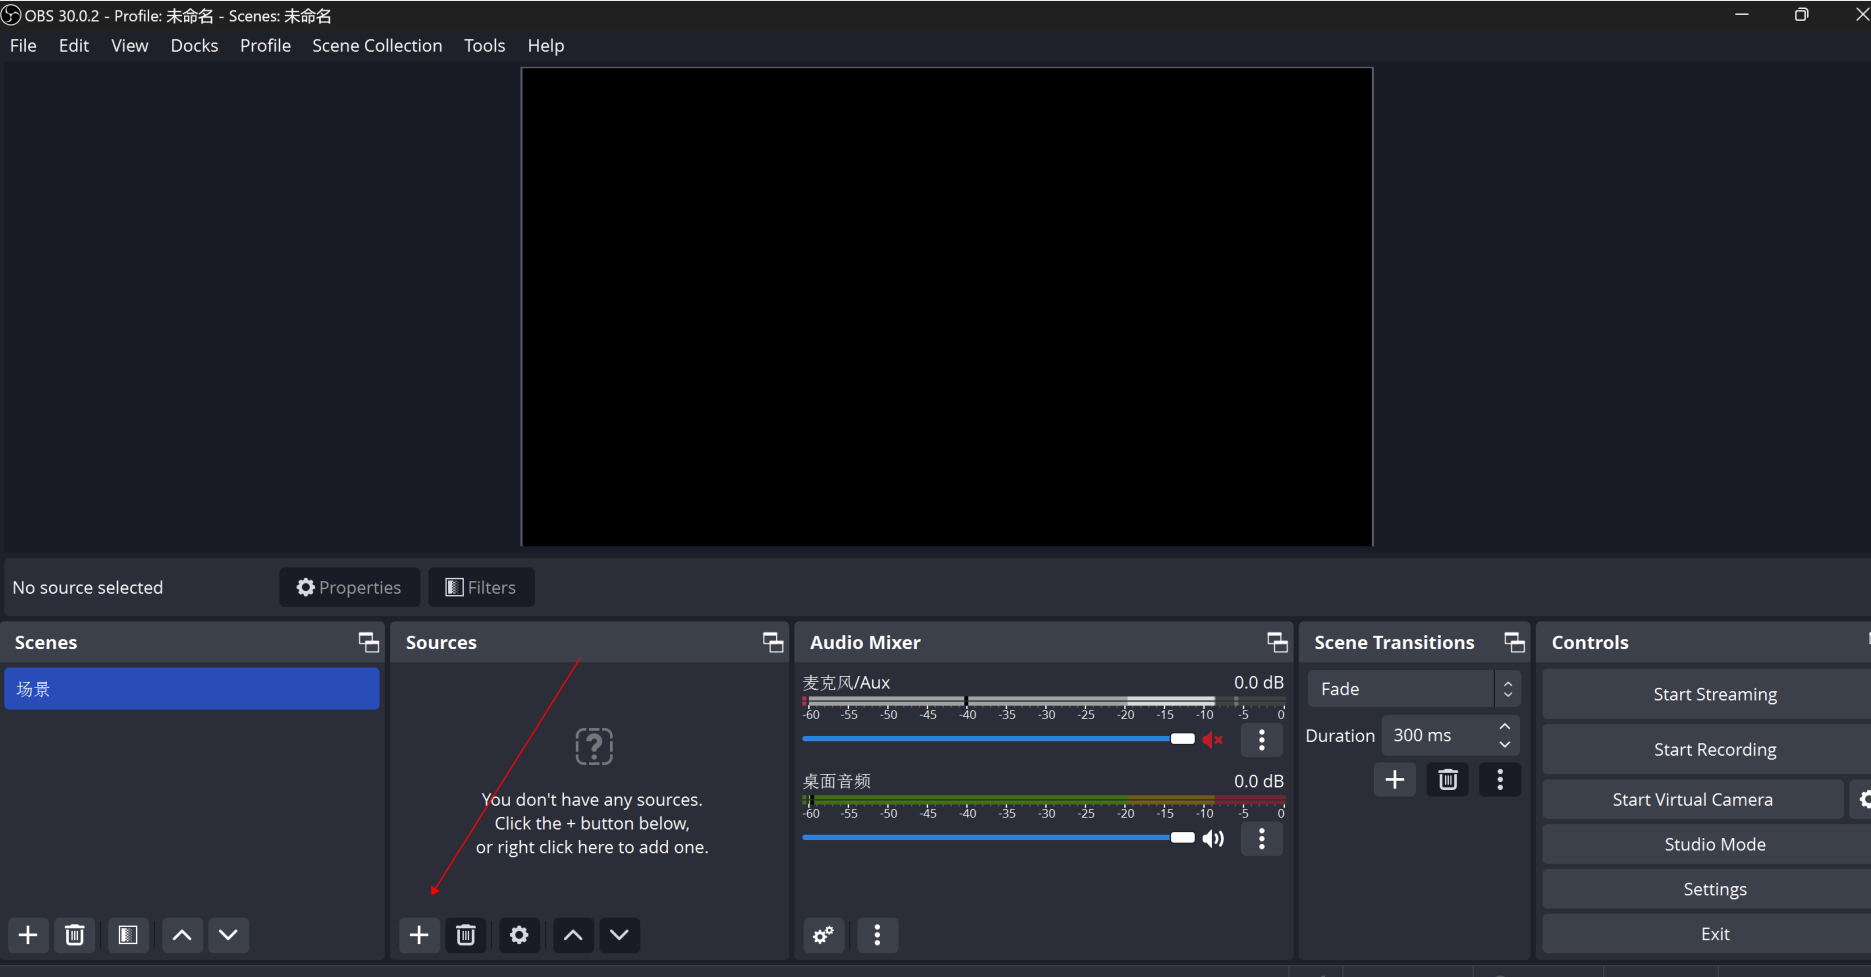
(1) Open the OBS software.
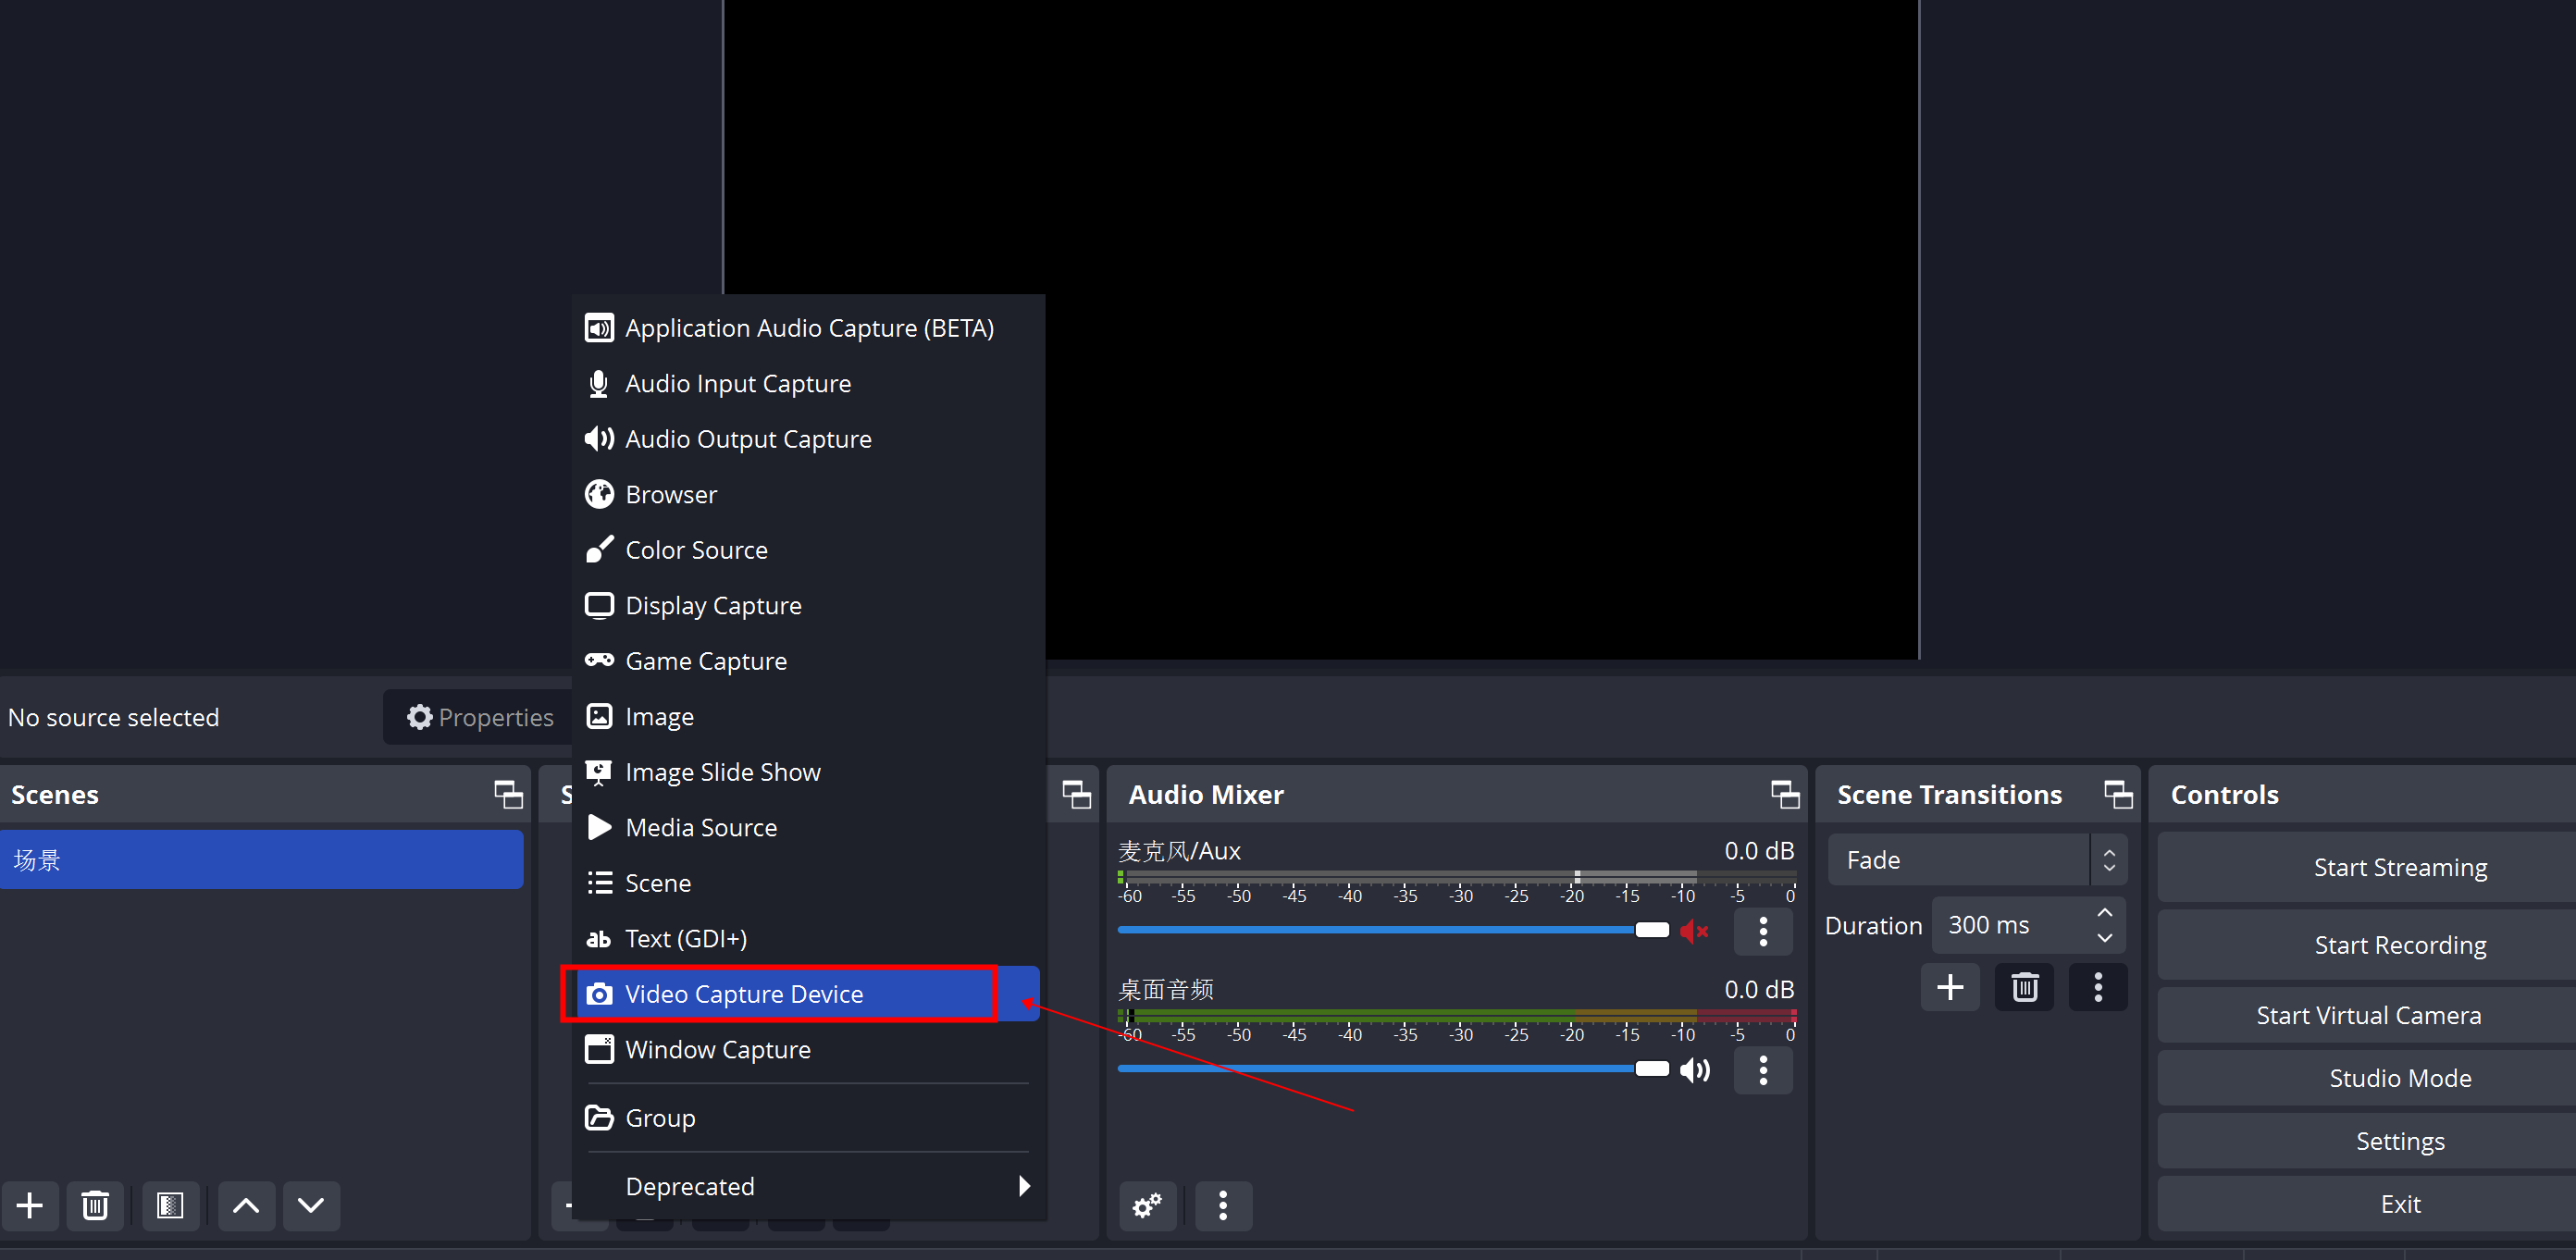
(2) Click on the video source +
(3) Click "Video Capture Device"
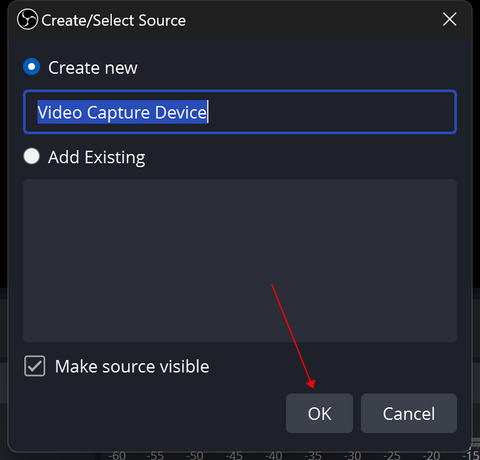
(4) Create a name for your video source or choose an existing video name. Click "OK"
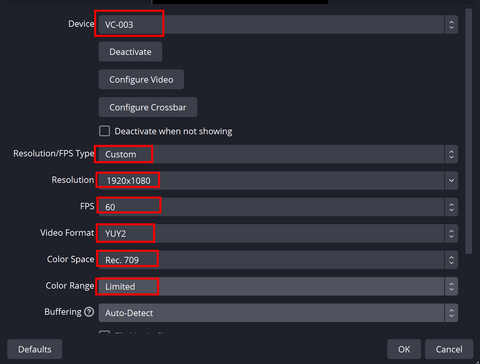
(5) Open the properties of "Video Capture Device", select "custom" for resolution/FPS Type, "1920×1080" for resolution, "60" for FPS, "YUY2" for video format, "REC.709" for color space ,and "full" for color range. Finally, select "OK" to save the Settings.
2. Suggested parameters for recording video by OBS software
(no need to set if you don't record video)
- Find "Settings" in the lower right corner of the software page, select "video", select "1920×1080" for Base (Canvas) Resolution, and select"1920×1080" for Output (Scaled) Resolution. Select "Lanczos(Sharpened scaling,36 samples)" for Downscale Filter. Select "60" for Common FPS values.
- 1. For the user who uses "Streaming", please click "Output" to set the "8000 Kbps" for Video Bitrate, "Hardware (NVENC)" for Encoder, "128" for Audio Bitrate.
- 2. For "Recording" users, the recording path & recording quality (affecting the screen quality) can be set, " Indistinguishable Quality, Large File Size" for Recording Quality. "MP4" for Recording Format, which is more compatible with more players and APP video software. Finally, "Hardware(NVENC)" for Encoder (No need for live streaming and recording can be ignored)
- 3. The user who uses "streaming" can enter the "stream key" of the live streaming platform and click in the bottom right corner of OBS to start the Streaming. (No need for streaming can be ignored).
3. Windows POTPLAYER software setting parameters (with OBS
software can only choose one)
- Open "DaumPotPlayer", click "PotPlayer" in the upper left corner, select "Open", and select "Device Settings".
-
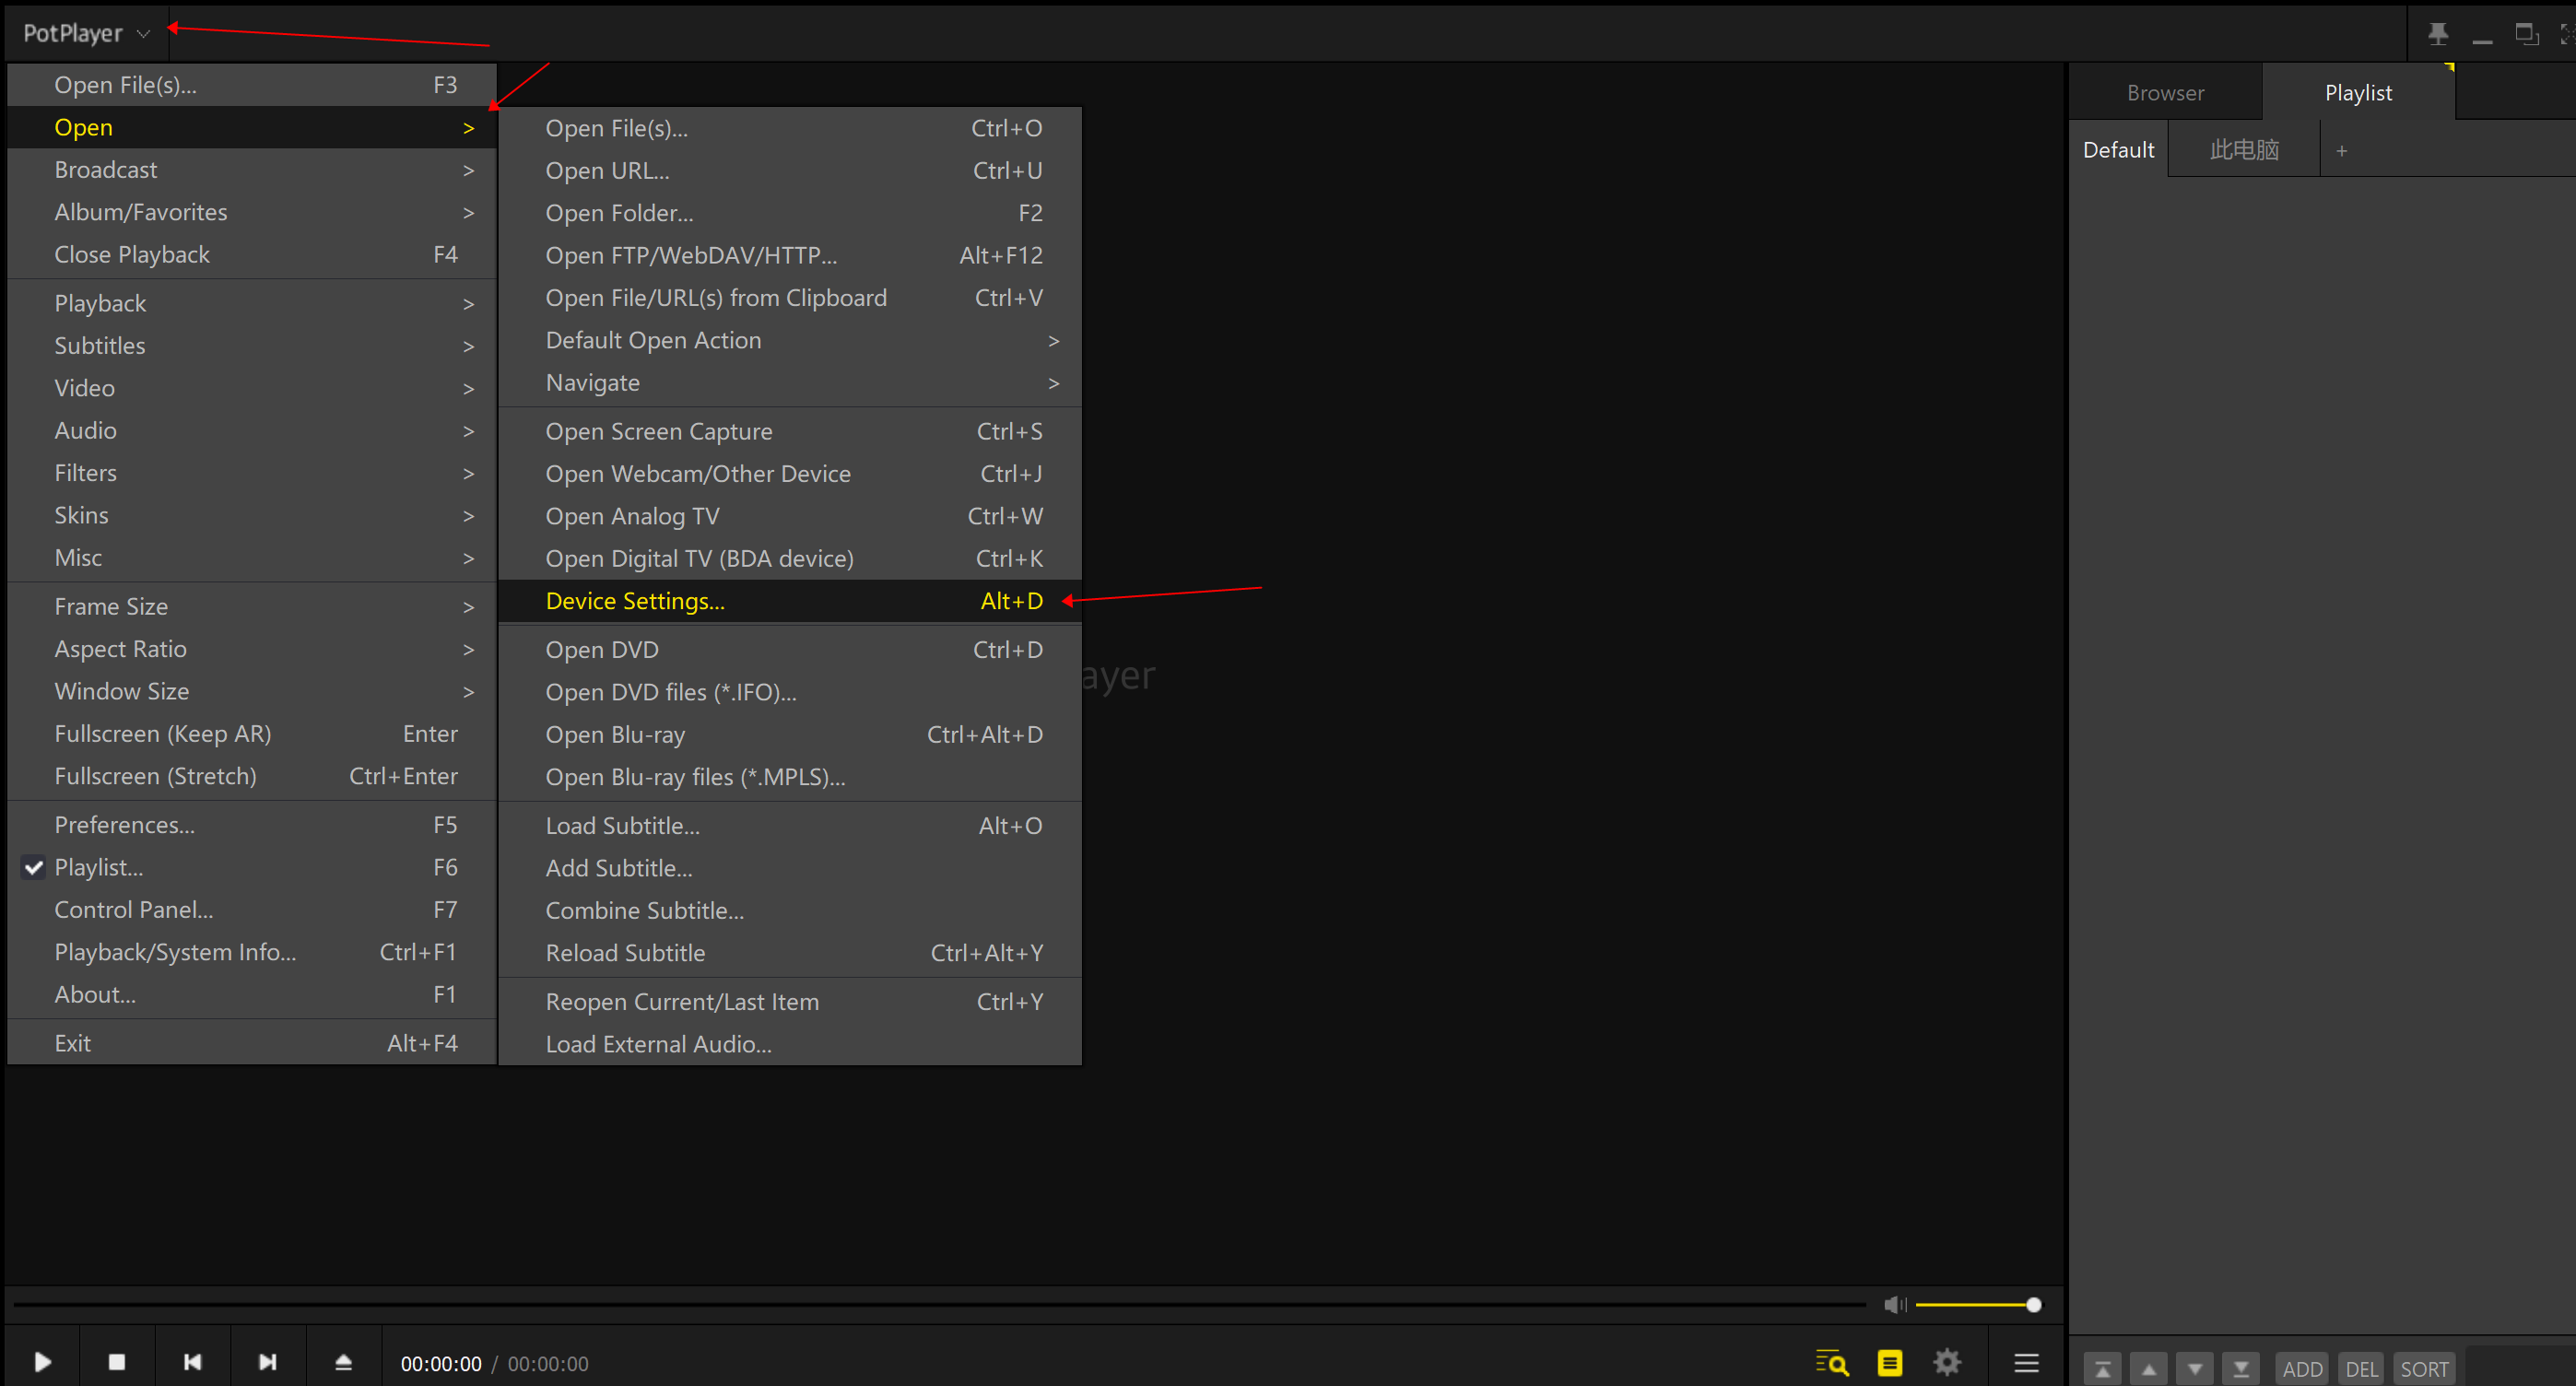
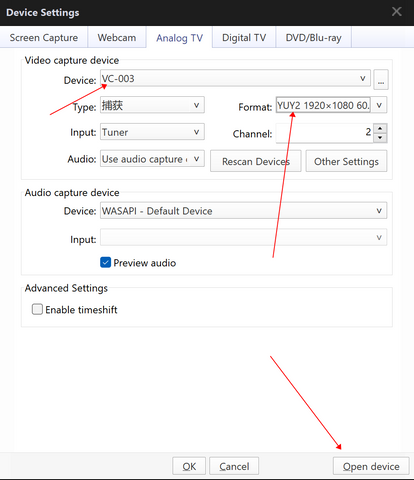
- After selection, enter the "property setting", select "Webcam" or "Analog TV", select the corresponding property in the list, and the format can be freely selected according to user needs.
-
4. Suggested parameters for recording video by POTPLAYER
software (no need to set if no recorded video)
-
Users who need to record can select "PotPlayer", select "video", select "video recording", and "record video", then select the corresponding properties according to the needs of users, and click Start.
5. Sound capture method of capture card in Windows system
- Right-click the small speaker symbol in the lower right corner of the computer desktop, click "sound properties"
-
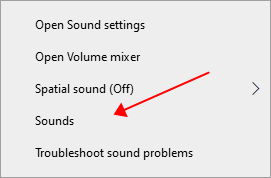
-
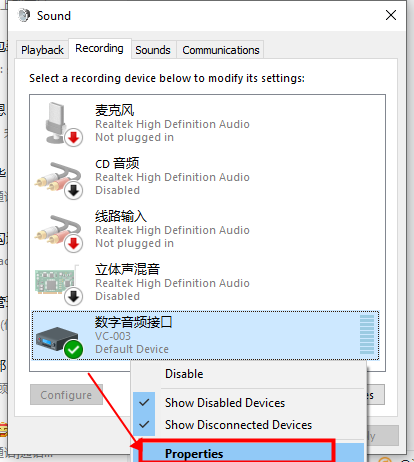
- Click "Recording", and then right-click the "VC-003 audio" properties
-
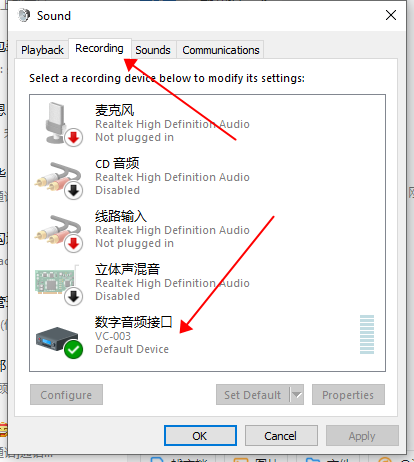
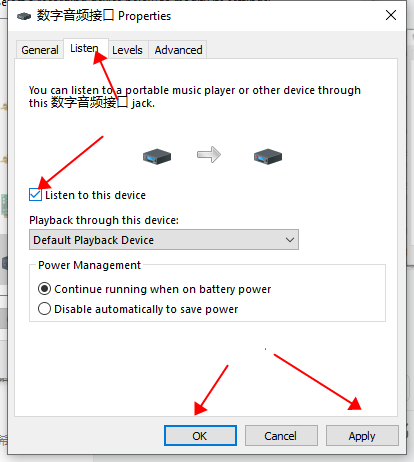
- Select "Listen", "listen to this device" by ticking. Find "Default Playback Device" on Playback through this device, Choose "Continue running when on battery power" on Power Management. Click "OK".
-
- Click "Advanced" to check whether the "exclusive mode" is ticked, which needs to be ticked. Exclusive Mode: Tick "Allow applications to take exclusive control of this device" and tick "Give exclusive mode applications priority", click "Ok"
1. Capture Settings for OBS Software in the MAC system.
(1) Open the OBS software screen
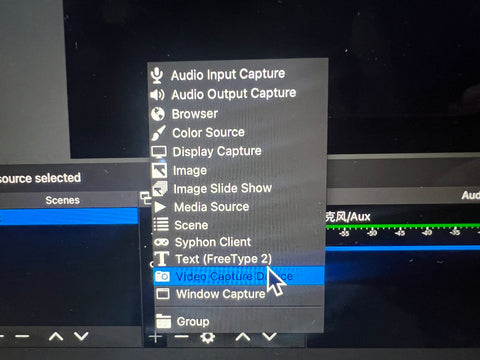
(2) Click on Sources +
(3) Select the "Video Capture Device"
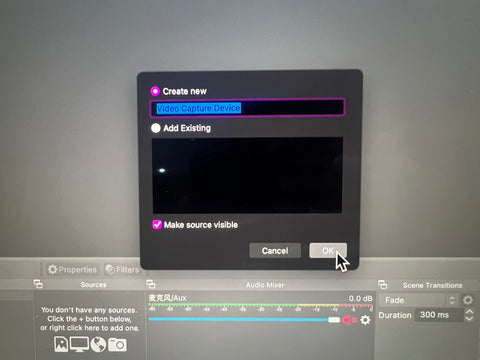
(4) You can create a new source or select an existing device name, and then click "OK" at the bottom.
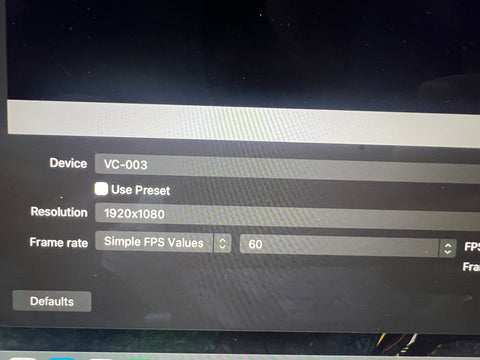
(5) Then a corresponding attribute parameter table will be created. We need to uncheck "use preset", set the "resolution" to "1920×1080", and set "frame rate" to "simple FPS Values", set "FPS" to 60.
2. Sound capture method of OBS software in MAC system
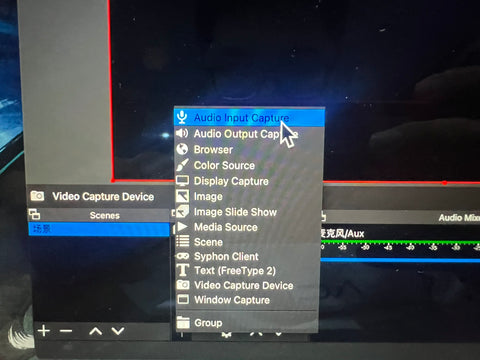
(1) Click on Sources +
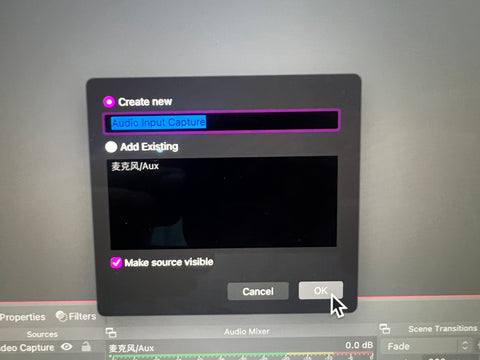
(2) Select "Audio Input Capture". You can create a new source or select an existing device name, tick "Make source visible" and then click "OK" at the bottom.
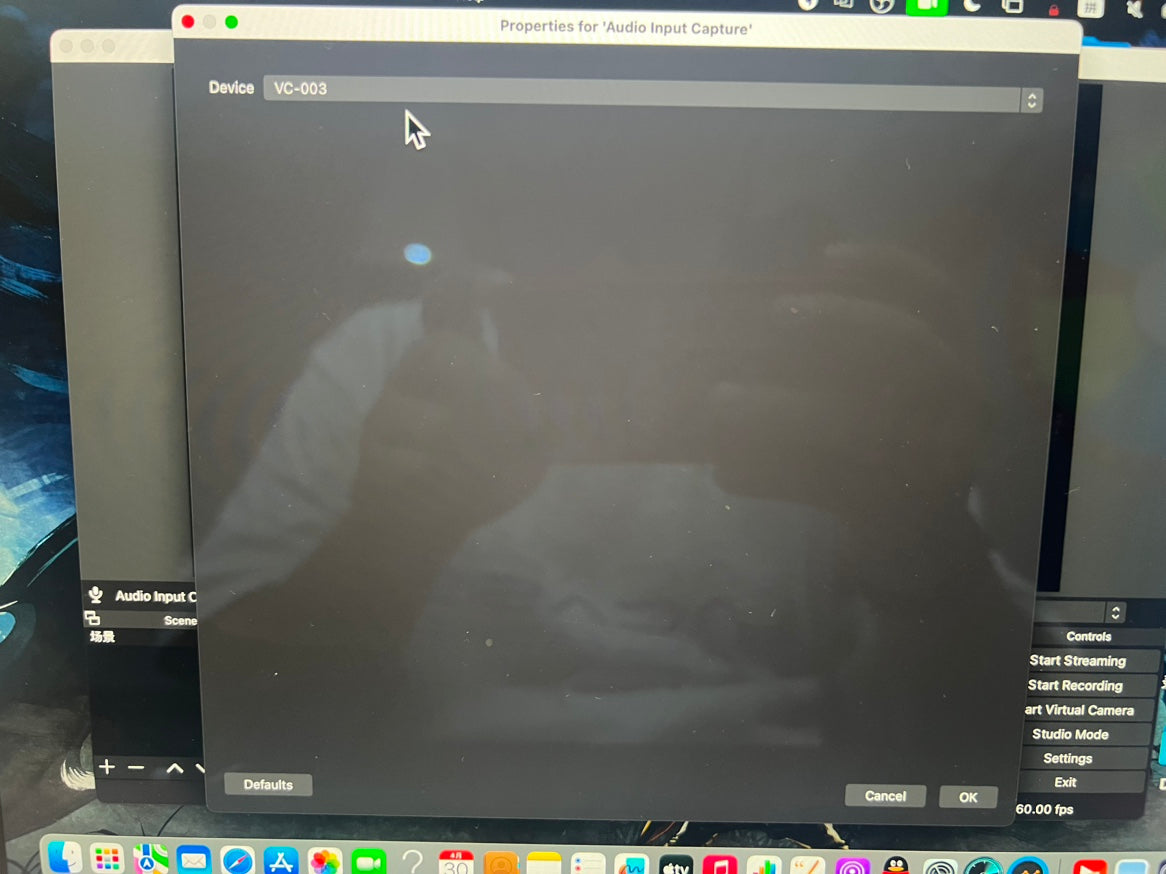
(3) Select the name of the device "VC-003 Audio"
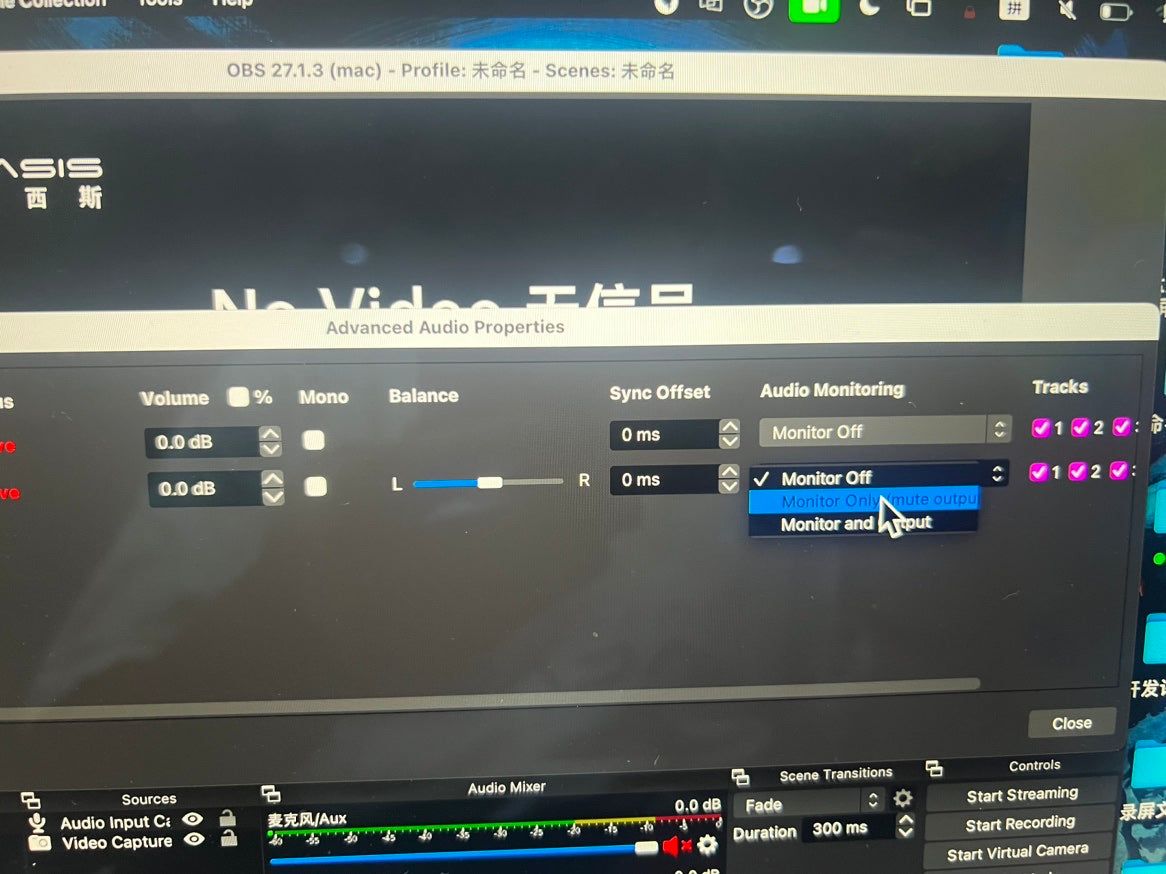
(4) Click "Edit" in the upper left corner of OBS software to select "Advanced Audio Properties"
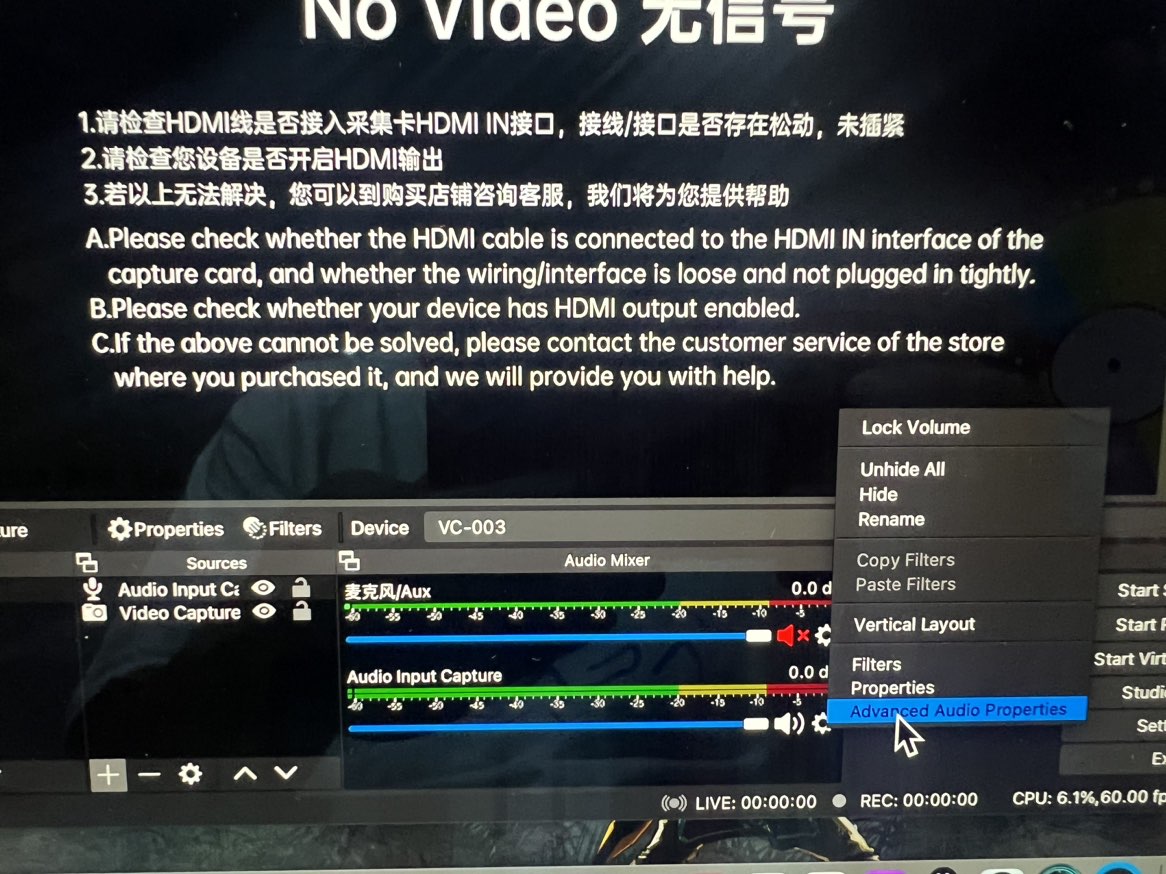
(5) Select "Monitor Only" in Audio Monitoring
For more detailed operations and illustrations, please see:
VC-003 Capture card
PCIE capture card
Advantages: More stable performance and more connection options. Multiple video sources can be captured simultaneously.Disadvantages: Not convenient to carry, the operation is more complicated, and the driver needs to be installed before it can be used. (Note: The PCIE capture card component is very fragile, please use it with care)
Introduction to the interfaces:
HDMI/SDI IN: Connect to Camera, Video camera, PC game, TV box, etc.PCIE interface: Connect to Computer host
Regarding the use:
- Before installing the PCIE capture card, the computer must be shut down.
- Connect the PCIE interface of the capture card to the computer's corresponding PCIE X1 or above interface (different capture cards require different PCIE interfaces)
- After the installation is completed, turn on the computer and install the driver
PCIE capture card driver download:
Capture card driver
For driver installation and product usage, please refer to the product manual:
Manual
Thunderbolt capture card
Advantages: Easy to use and carry. With more stable performance and more connectivity options. Multiple video sources can be captured simultaneously. The Thunderbolt acquisition card with two Thunderbolt interfaces has a daisy chain function and can be expanded to more interfaces.Disadvantages: You need to install the driver to use it (some need to be connected to the power supply to use, and some are only suitable for Windows systems)
Introduction to the interfaces:
Thunderbolt 3 port: Connect to Laptops, iMacs, desktop computers, etc. (The device must have a Thunderbolt interface to use)HDMI/SDI IN: Connect to Camera, Video camera, PC game, TV box, etc.
HDMI/SDI OUT: Connect to monitor
PCIE capture card driver download:
Capture card driver
For driver installation and product usage, please refer to the product manual:
Manual


